
I can’t even explain how much of a hit this was.
A couple Italian friends here in LA asked me to make focaccia alla genovese before I departed for Milan. I had never baked focaccia before, but there was a recipe in my copy of “The Italian Baker” (highly recommended!) so I told them I’d give it a try.
For those of you who don’t know, focaccia is a round or rectangular sheet of leavened bread that has become a national Italian staple. It has various names throughout the country, but it’s true home is Genoa and the simple grandmother of all focaccia is topped with olive oil and salt. Now, tons of variations have been born with savory delights baked in or put on top (everything from olives and capers to sweet onions sweated in oil, cheeses and roasted tomatoes) and a few sweet varieties have taken shape, too (like a raisin bread with crystalized sugar on top or a brioche variety in Bologna, stuffed with ice cream).
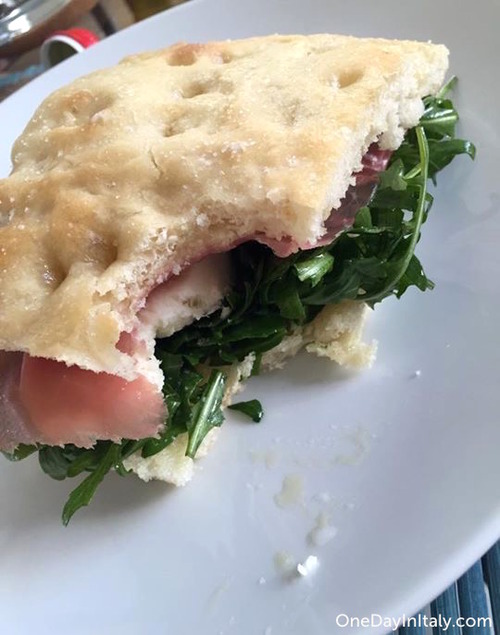
“The Italian Baker” lists several options for toppings, but my friends had asked for the simple original as they wanted to make prosciutto, mozzarella and arugula sandwiches with it (it seems like a thin bread to try to cut in half, but it’s possible!). I had been to a focacceria in Florence that had the most incredible sandwiches! A local friend and I had tried the porchetta (which was good) and a finocchiona (a type of salami pockmarked with loads of fennel), pecorino and zucchini salad one that I still can’t get out of my head. Delizioso!
There are a lot of different recipes for focaccia online. Many of the Italian ones I found used brewer’s yeast and / or malt, neither of which they had at my local grocery store. ”The Italian Baker” recipe didn’t ask for either of those – and I’ve had great luck with it’s recipes in the past – so I opted for that one.
Now, let’s get down to business.
For Focaccia alla Genovese you’ll need:
7g active dry yeast (one packet, typically)
1/4 cup (60 grams) warm water
2 1/4 cups plus 1 to 2 tablespoons (555-570g) room temperature water
4-5 tablespoons (60-75 grams) – or more! – olive oil
Scant 7 1/2 cups (1 kg) unbleached all-purpose flour OR half all-purpose and half bread flour (I used four cups of bread flour and 3 1/2 cups of all-purpose)
1 tablespoon (15g) fine sea salt or table salt
1 1/2 to 2 teaspoons (8-10g) or more course sea salt to sprinkle on top (I didn’t have this on hand so just used regular table salt – it was totally fine)
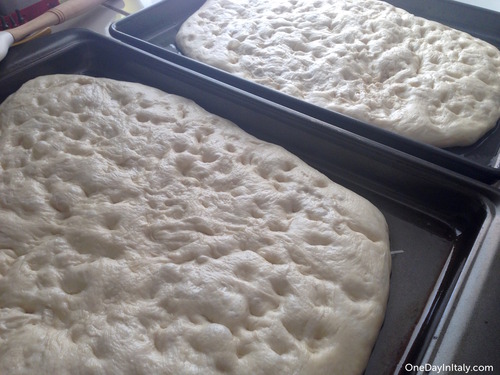
2 rectangular baking sheets or three round ones
2 damp towels
1 large mixing bowl (or stand mixer bowl)
1 oiled bowl (for rising)
A kneading surface or stand mixer
An oven preheated to 400 degrees F
1 – 3 drying racks
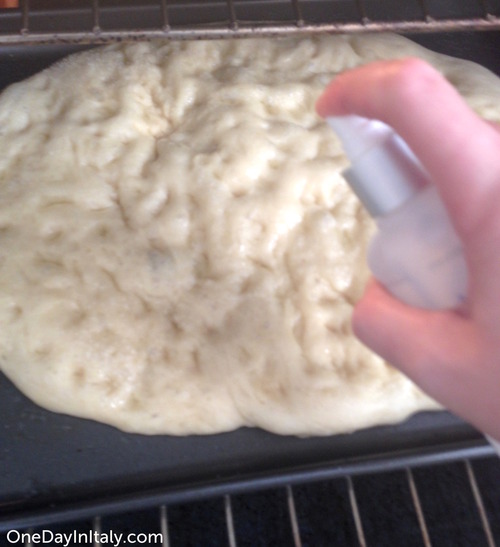
1 spray bottle filled with room temperature water
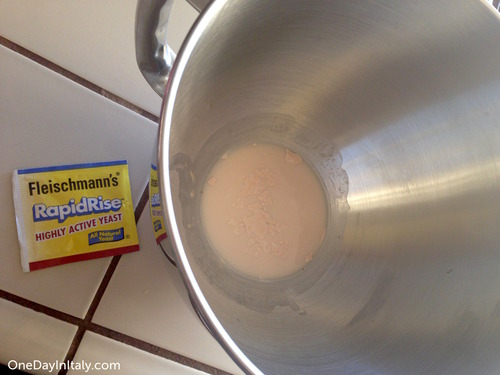
As always, start with the yeast. Dissolve the entire packet in 1/4 cup warm water and let sit until creamy, about 10 minutes.
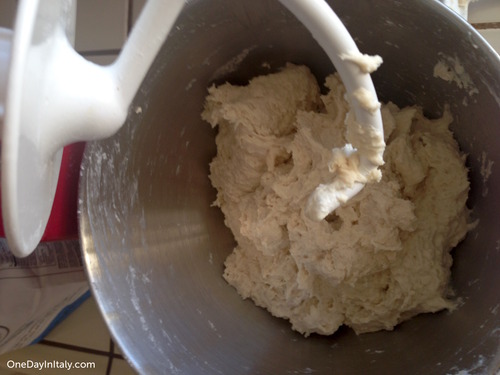
Stir in 2 1/4 cups plus 1 tablespoon of the room temperature water and 2 tablespoons of olive oil. Once loosely combined, add all 7 1/2 cups of flour and 1 tablespoon of table or fine sea salt (or, if you’re an absent-minded idiot like me, forget the salt and knead it in afterwards… do try to add it here, though). Add another tablespoon of water if you think you need to; the dough should be sticky but able to be removed to begin kneading.
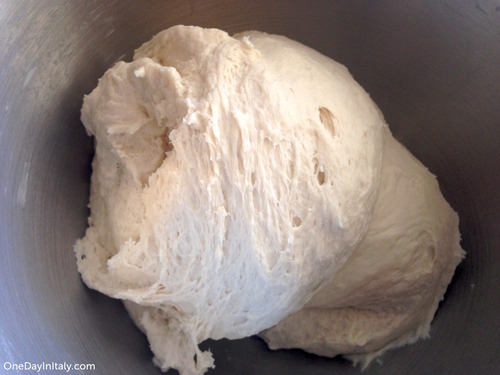
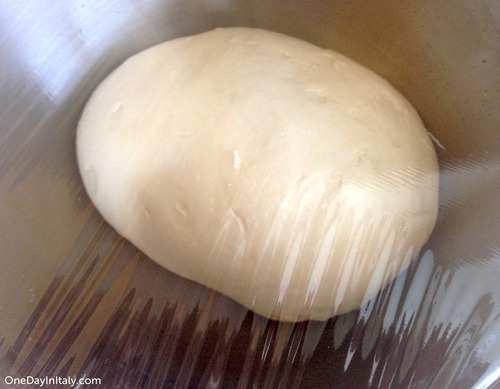
When finished, put it in an oiled bowl covered in clear plastic wrap and place in a warm (not hot!) place to rise for 90 minutes.
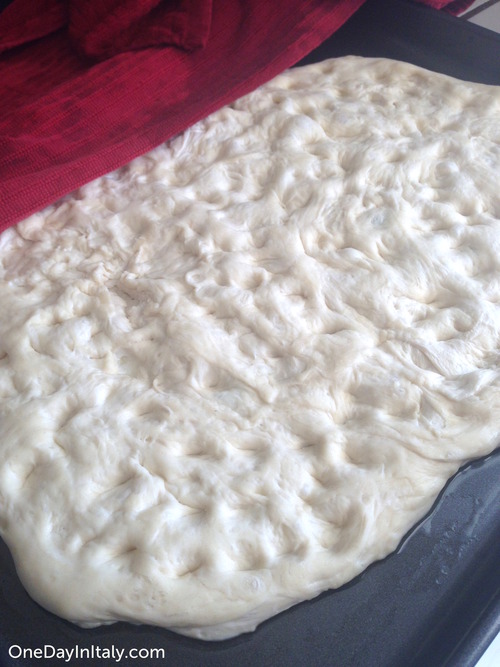
I chose the two larger rectangular pieces. Place the piece of dough on an oiled baking sheet and pull it to stretch it into your desired shape like you would with pizza dough. It won’t pull back like pizza dough, though, so don’t overdo it!
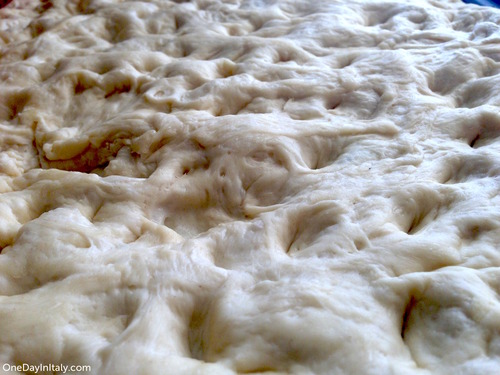
Cover the sheets with damp towels and let rise again for 30 minutes. Then uncover the dough and dimple it – take the tips of your fingers and randomly press into the dough. You can do this quickly; there’s not really an art to it and you can’t go too deep (unless you break through to the pan – don’t do that! We want dimples, not holes).
About an hour and forty-five minutes, preheat your oven to 400 degrees F. If you’re using baking stones under the baking sheets, put them in right away (you want them to be at temperature for thirty minutes before placing the loaves on them). Baking stones aren’t necessary, though (I didn’t use them).
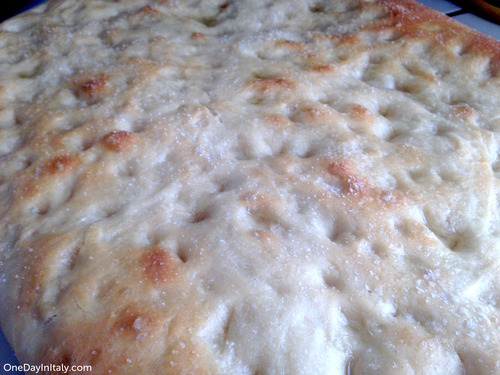
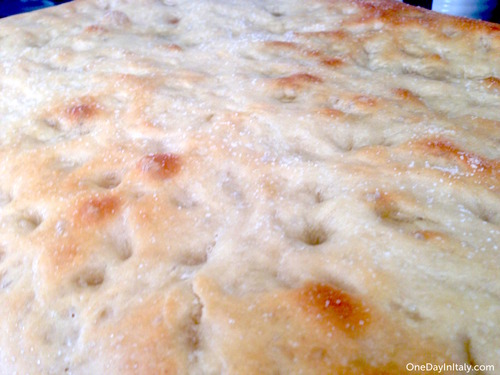
After two hours, dribble olive oil over the top and sprinkle as much salt as you want. You may want to dimple some areas again if they’ve risen too much (the idea is that the oil will settle inside the dimples while it bakes). Then take out your trusty spray bottle and spray them evenly with a thin layer of water; this will keep them from drying out while baking.
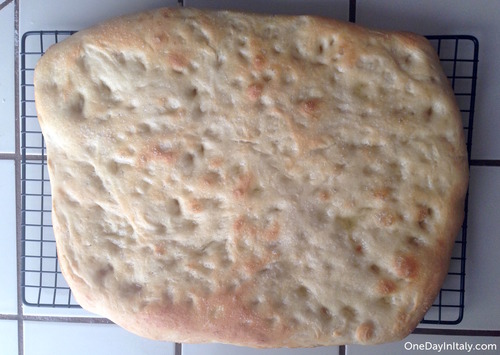
Watch it carefully and after 20-25 minutes, when the top begins to golden, take it out of the oven and place the loaf immediately on a drying rack so the bottom doesn’t become soggy. Note that the entire top won’t be golden, only spots.
Eat it in pieces as a snack or, do what my friend did and carefully slide a serrated knife through the middle of the focaccia to turn it into an incredible sandwich bread. He then tossed some arugula in olive oil and white balsamic vinegar, sliced a few balls of mozzarella and layered a few pieces of prosciutto on top – the perfect sandwich!
Comments
comments


Leave a Reply